- How to shoot and stitch an astro-panoramic image
-

Photographer Rob Dickinson is crazy about landscape photography, which started as a hobby when he moved to New Zealand and here he reveals how to create a 48 shot astro-panoramic image.
It all comes back to passion for the beauty of nature, being out in this amazing country, in crazy weather, alone or with a group of equally crazy people.
In New Zealand there are so many stunning locations, and like a lot of people, I bought a camera, started taking landscape pictures and the whole thing snowballed. I'm part of an awesome group called 'One of a Kind Photography Adventures' and now give talks on astro-photography and run workshops.
I'm not sure if New Zealanders realise quite how special this place is. I spend as much time as I can out making photographs. It's always an evolving thing, trying to capture new places, and old places in new ways.
As a techie I love all the new gear we get to play with, its a golden age for photography, but the important part is what you bring to the shot from inside.
This 360-degree image taken on a night out above Queenstown half way up the Remarkables mountain range and I was shooting with a Novoflex VR Slim panoramic head, Canon EOS 6D and Canon 35mm f1.4L MKII lens. You can shoot a panoramic with nothing but camera and tripod, but this often gives you issues when shooting or stitching so I always try and use a panoramic head when possible.
With the 35mm lens in portrait I knew that I needed 16 shots in a circle to produce a 360 degree panoramic. I also determined nodal point beforehand too (needed if you have things close by). I walked around to find my composition and set up my tripod and camera and ensured it was all stable and level. I also use a cable release for the astro so as not to touching the camera for exposures – a two second self-timer will also do. I'd also decided on an exposure of 15 seconds (minimal star trailing), f/3.5 for depth of field for the foreground rock, and an ISO of 6,400. I shot RAW images for processing later.
I started shooting with the lowest row of images and pointing at an identifiable landmark (the foreground rock) to save me from having to count to 16 every row. Once a shot was completed, I rotated the camera to the next indexed location for the row, then tilted the camera up (30 degrees) and shot the middle row, then the top row. I was careful not to knock the camera, and reviewed the images quickly so I knew I had shot the whole image as I wanted it.
Generally with panoramics you are far better off with more images than less, so shoot extra frames if you have the time. The downside with astro is this takes longer and the stars move.
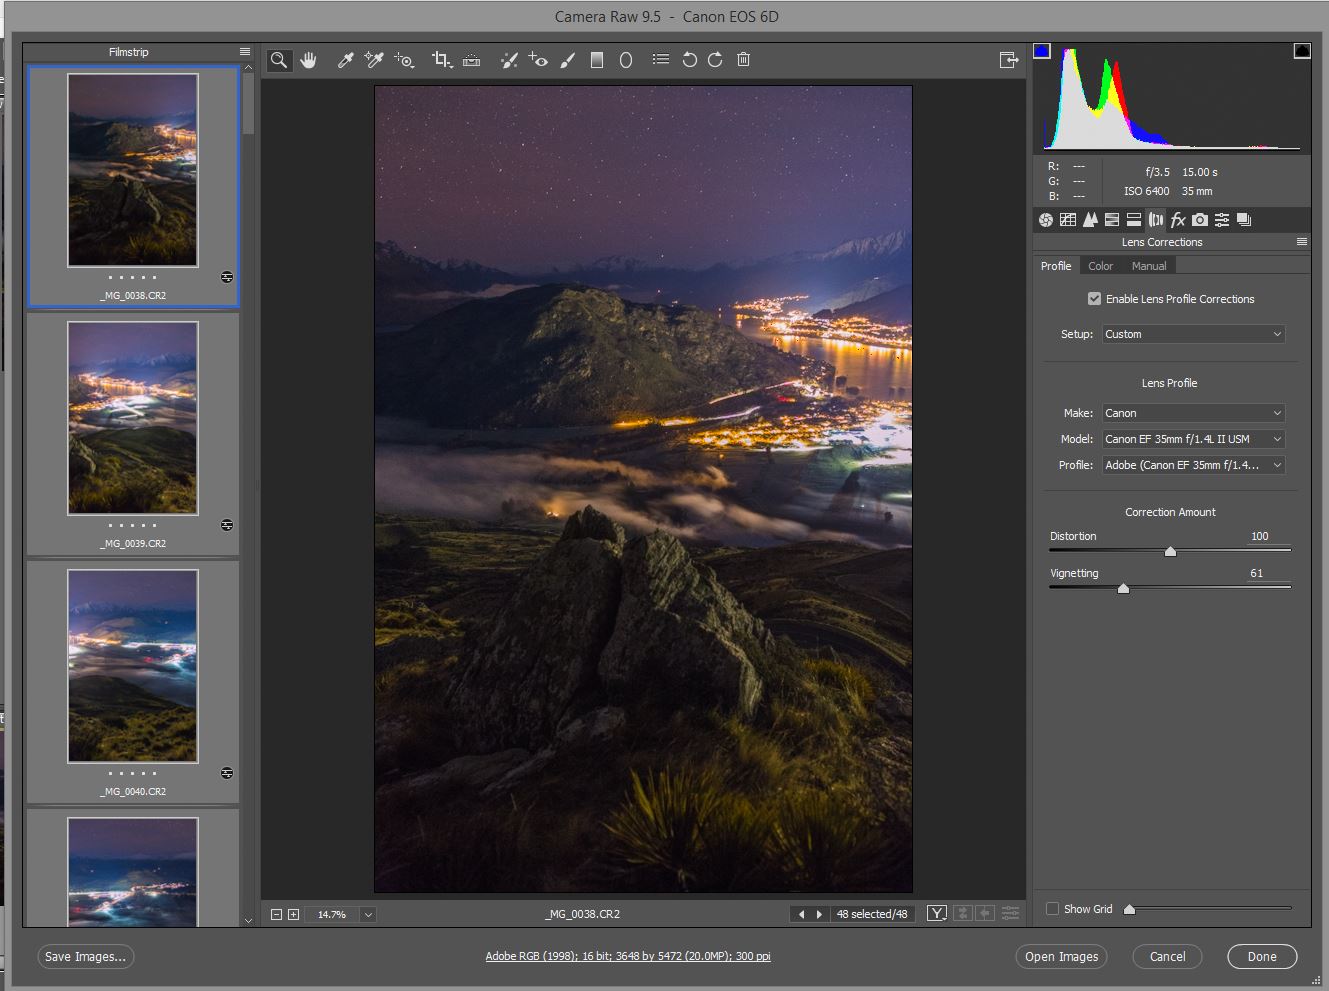
Next I loaded the files onto my computer – I use Adobe Bridge, Adobe Camera Raw, PTGui for stitching and Adobe Photoshop. All images were opened at once into camera raw to make initial adjustments for white balance, levels and colour. I then applied lens correction mostly to correct any vignetting – I often find this too aggressive so pulled it back a little. I then exported all these images as 16bit tiff files and dragged them over to PTGui for stitching.

This is the key point in my workflow that saves heaps of trouble. Because I shot this in a fixed spacing grid, I can tell PTGui roughly where all the images should be, which helps with the alignment of them. I set three rows of 16 images (48 total) and that it’s a 360 degree panoramic.
I then told PTGui to align the images and check the panorama editor to make sure they are all where they need to be, and make any changes required (this stitched just fine) for a 360. I also set the mid-point for where I wanted my center to be.
Finally, once I was happy with it I exported the panoramic as a Photoshop large document at full size and loaded into Adobe Photoshop for editing. I cropped the image (360 images need top and bottom cropping usually), made a few adjustments (these are usually curves, colour and a little selective edits) to bring out some features.