- Aerial Photography and Videography Tips
-
Michael Haluwana is an award-winning photographer and videographer who has worked on iconic projects with Sir David Attenborough on BBC Planet Earth II documentary. With his expertise in aerial photography and videography, he shares his tips on everything from staying safe, to choosing the best gear and settings for the job.
Before embarking on your shoot, it’s worth researching your location and thinking about what you want to capture - what’s your vision and inspiration? Look into the forecasted weather and consider the movement of clouds and wind speed. Ideally, time your shoot for favourable weather conditions to get the most out of your time.
It’s important to have the right camera and lens suitable for aerial shots, and that usually means having high shutter speed and resolution. My go-to gear is the Canon EOS R5 paired with the Canon RF 70-200mm f/2.8L IS USM or Canon RF 24-70mm f/2.8L IS USM lenses. If you get the opportunity to do aerial shots from a plane, I recommend sticking to one lens per camera body during the flight and leaving the lens hood at home. Heavy wind can get trapped in the lens hood and if it gets loose it can become a potential safety hazard. As for any aerial shoot, make sure you have plenty of charged batteries and spare SD cards easily accessible and ready for use. The last thing you want is to miss a remarkable shot as timing is everything!

I like to rely on the camera autofocus to adjust for the ground speed and moving objects. The Canon EOS R5 has up to 5940 auto focus points which comes in very handy. Consider using back button focus too as it will help you capture moving targets.
I recommend shooting in manual mode as it allows you to adjust the shutter speed, ISO and aperture according to the location conditions. If you’re moving with a camera with a plane or drone, you will need to adjust the shutter speed from 1000-2000. This can vary due to ground speed. It’s always good to take a few test shots. For aperture, try keep it low at f/2.8 if possible as this allows more light to get through the lens.

The great thing about using a camera such as the Canon EOS R5 is that it provides the option to shoot high quality footage in 4K 120p which helps slow down videos post-production. My preferred aperture for aerial filming is between f/2.8 – f/4. For stabilisation and steady filming, I occasionally like to use a gimbal however, the Canon EOS R5 and Canon RF lenses have in-built image stabilisation which helps capture smooth footage when shooting handheld. One my favourite features on the Canon EOS R5 when it comes to videography is being able to use the view finder to frame my subject and record at the same time.
Drones are another way to get amazing aerials shots and provides you more time and freedom to plan your frame and angles, compared to a plane where there’s so many movement parts.
Keep in mind when shooting with a drone in Australia, you are required to follow all Civil Aviation Safety Authority (CASA) and local council rules and regulations. All rules can be found in the CASA website or by calling your local council where you reside/plan to photograph/film. I also use an app called Open Sky, when planning my locations.
Always take time to do a pre-fight checklist which will help you avoid encountering issues during the flight. Consider the following;
Dividing Line and Unique Patterns: This is the best way to create aerial art. Top down framing gives you more flexibility to find the dividing lines which provides you with image contrast and pattern. Look for lines, patterns and different colours and textures. Using the third grid overlay as a guide for composition will help you get your desired shot.

Long Exposure/ ND Filters: When taking long exposure photos, you need to keep the camera as steady as possible for the duration of the long exposure interval. This can be achieved with drones but, it’s best to try this on days with minimal wind. I use high value ND filters such as the ND250, ND500 and ND1000. I love capturing long exposures of ocean waves. I recommend shooting an area where you have a steady subject as well a moving subject to create a strong effect. For example, waves slamming onto rocks. With your shutter speed, play around with few settings in the exposure, aperture, and ISO until you get your desired result. In the below image, I have used ND500, 2 second exposure, f/2.8 with ISO 200.
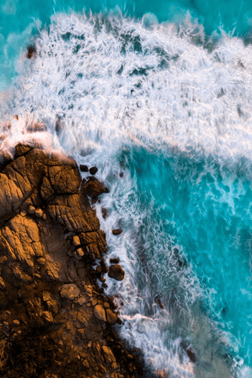
Multiple Exposure AEB (Auto Exposure Bracketing): Given the broad scope you can capture in a single frame, achieving the right exposure can sometimes be tricky with blown-out bright or dark areas. Relying on a single exposure setting can result in loss of detail. I usually like to use AEB with five different exposure settings. This captures several shots simultaneously at different exposure settings. The camera retains the raw composition images giving you the opportunity to combine them in post-processing. Working with AEB gives me more control over the process when I’m creating my final High Dynamic Range image.
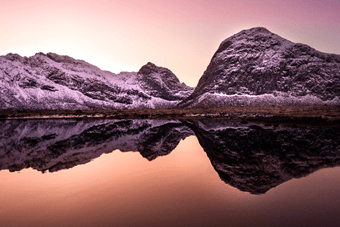
Contrasting Colours: It’s easier to isolate colours and look for contrast with a top down shot. Take the image below for example, detailing ocean waves, sand, and rocks. Give every colour you see an opportunity to be part of your final art. Try to fit everything into one frame and adjust the height of the drone to isolate colours and create your desired frame.


Shadows: Using shadows are one of my favourite ways to get creative with photography. Depending on the suns position, you might be able to get the length of the shadows to match your planned shot. Remember to always be ready to shoot, as shadows can change quite quickly. I use the sun tracking app, Sun Seeker to determine the path of the sun to plan my shot.
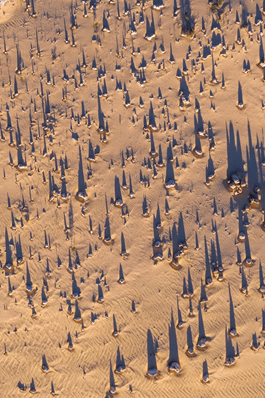
Horizon and Photography/Videography in Low Height: I love framing the foreground and background as it really brings a shot to life. Try taking photos/video with the drone at a low height and gradually raise the drone to capture your shot using the sky as the background. This helps show different perspectives and depth that you might not see with a front-on image. Keep in mind when you are flying in low altitude there’s a higher chance of crashing your drone. It’s a good idea to have a spotter who can keep an eye on the drone while you frame your shot.
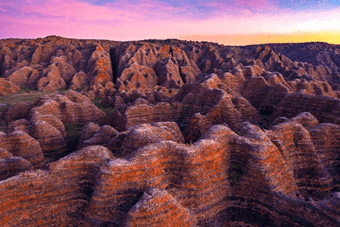
People: Having people in photos/videos helps with scale and connecting a person and activity. It creates the opportunity for the viewer to imagine themselves in that location or participating in the activity. I usually like to limit this to 1-2 people. Take your time and try to place people where it will give you the best composition and scale. In the below image, I have placed models in relation to the location and to fill any negative space. There are rules around flying over and close to people with drones. I strongly suggest doing further research before incorporating people in your aerial photography/videography.
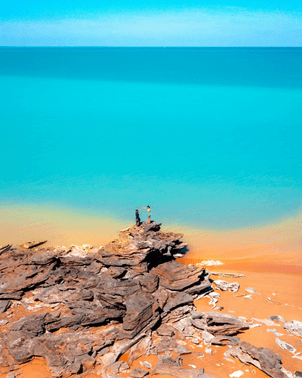
Regardless of whether you’re on a plane, using a drone, or shooting from lookouts and ranges, aerial photography and videography is a great way get creative and enhance your shots.
Find out more about Michael's work on his Instagram and website.

Matt Cherubino shares aerial photography tips using the EOS R5.

See 10 of the most celebrated images of 2021 captured by the Canon Community.

This year we've seen some incredible work come through from our community. Here are 15 of the most celebrated images of 2020.