

Solution
Part I. Preparing for Live View ShootingPart II. Selecting the AF Mode
Part II-1. Using AF (Live Mode) to Focus
Part II-2. Using AF (Face detection Live Mode) to Focus
Part II-3. Using AF (Quick Mode) to Focus
Part III. Focusing Manually
Part IV. Shooting
General Note for Live View Shooting
With your camera, you can shoot photos while viewing the image on the camera's LCD monitor. This is called "Live View shooting."
This page describes how to change the focus mode for Live View shooting. For details on how to perform easy Live View shooting in default settings, please refer to the related information.
Please note that some shooting procedures differ between still photos and movies. To shoot still photos, please refer to the instructions for still photos, and to shoot movies, please refer to the instructions for movies.
Part I. Preparing for Live View Shooting
1. Flip out the LCD monitor, and then set the power switch to ⋖ON⋗.
For the details about how to open the LCD monitor, see How to use the vari-angle LCD monitor of the EOS 60D / 60Da.
2. Turn the Mode Dial to set the shooting mode.
 ⋗ (Movie shooting).
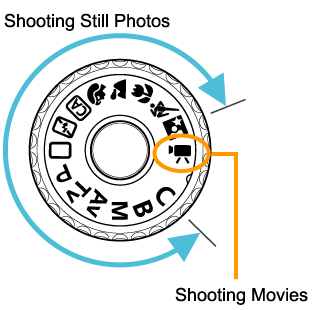
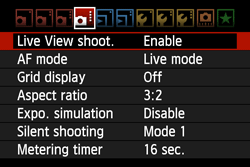
3. To shoot still photos, set the [Live View shoot.] menu to [Enable] under the [ 
To use AF to focus, please proceed to Part II. To focus manually, please proceed to Part III.
Part II, and III describe common procedures for still photos and movies.
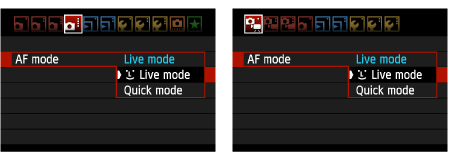
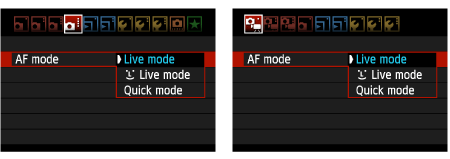
Part II. Selecting the AF Mode
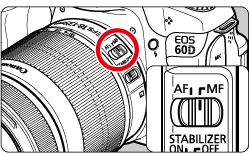
4. Set the lens focus mode switch to ⋖AF⋗.

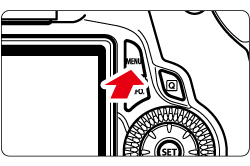
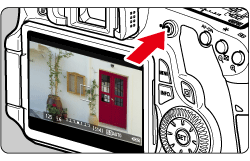
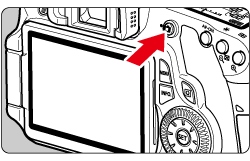
5. Make sure that the camera is ready to take shots, and then press the ⋖MENU⋗ button.
6. To shoot still photos, select the [ 
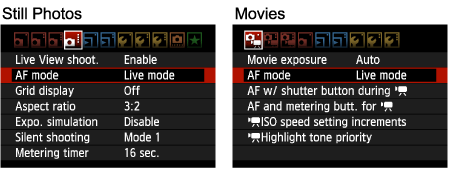
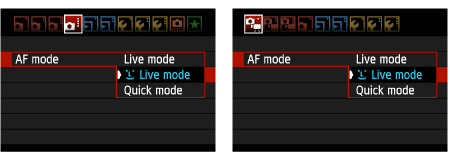
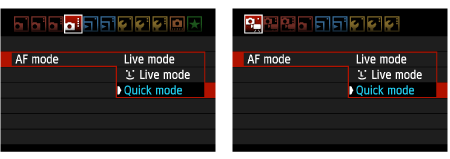
7. Select the AF mode, and then press the ⋖SET⋗ button.
8. To shoot still photos, press the ⋖ 
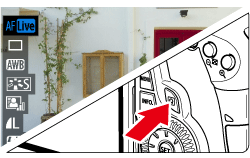
Caution
While the image is displayed on the LCD monitor, pressing the ⋖ 
Please proceed to Part II 1 to 3 depending on the AF mode setting.
Part II-1. Using AF (Live Mode) to Focus
When [Live mode] ( 
The image sensor is used to focus. Although AF is possible with the Live View image displayed, the AF operation will take longer than with Quick mode. Also, achieving focus may be more difficult than with Quick mode.
[Live mode] is set by default.
9. Move the AF point.
 ⋗ button.
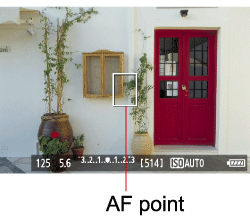
10. Aim the AF point over the subject and press the shutter button halfway.
Please proceed to Part IV.
Part II-2. Using AF (Face detection Live Mode) to Focus
When [ 
With the same AF method as the Live mode, human faces are detected and focused. Have the target person face the camera.
9. Focus the target face.
 ] frame will appear over the face to be focused.
  ] will be displayed. Press the ⋖Multi-controller⋗ to move the [ ] frame over the target face.
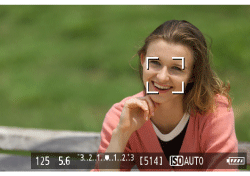
10. Press the shutter button halfway and the camera will focus the face covered by the [
 ] will be displayed and AF will be executed at the center.
Caution
Notes when shooting in [
] will be displayed. Please proceed to Part IV.
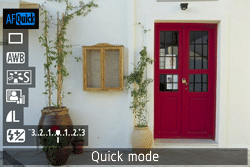
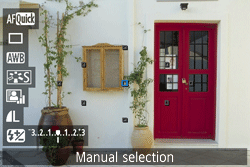
Part II-3. Using AF (Quick Mode) to Focus
When [Quick mode](
The dedicated AF sensor is used to focus in the same way as with viewfinder shooting. Although you can focus the desired area quickly, the Live View image will be interrupted momentarily during the AF operation.
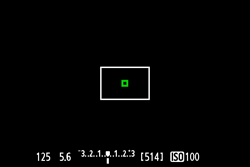
9. The small boxes on the screen are the AF points, and the larger box is the magnifying frame.
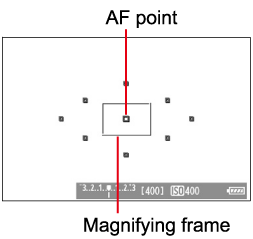
10. When you press the ⋖ 

11. Select the AF point. Press the ⋖
12. Aim the AF point over the subject and press the shutter button halfway.(Keep the shutter pressed.)
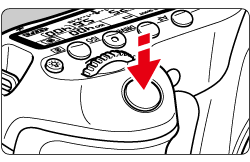
13. The Live View image will turn off, the reflex mirror will go back down, and AF will be executed.
Please proceed to Part IV.
Part III. Focusing Manually
You can magnify the image and focus precisely manually.
3. Once you have proceeded up to Step 2 of Part I, set the lens focus mode switch to ⋖MF⋗.
4. To shoot still photos, make sure that the camera is ready to take shots, and then press the ⋖
To shoot movies, set the Mode Dial to ⋖
5. The Live View image will appear on the LCD monitor.
Turn the lens focusing ring to focus roughly.
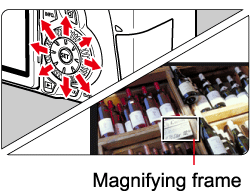
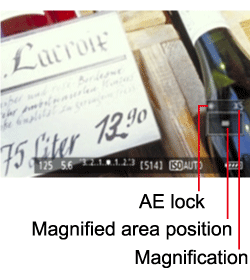
6. Press the ⋖Multi-controller⋗ to move the magnifying frame to the position where you want to focus.
To return the AF point to the center, press the ⋖
7. Press the ⋖ 
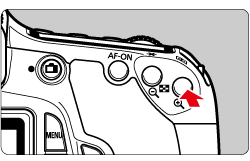
Each time you press the ⋖
Normal view -⋗ Approx. 5x -⋗ Approx. 10x -⋗ Normal view
8. While looking at the Live View image on the LCD monitor, turn the focusing ring to focus manually.
9. After achieving focus, press the ⋖
Part IV. Shooting
After focus is achieved by following the instructions in Part II-III, start shooting.
To shoot still photos, press the shutter button completely.
To shoot movies, press ⋖
⋗ again.  " mark will be displayed on the upper right of the screen.
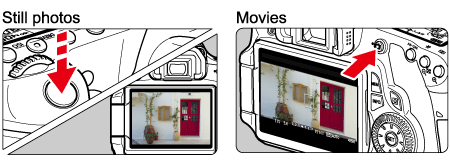
General Note for Live View Shooting
Please be aware of the following notes for Live View shooting.
Caution
Notes About the Live View Image
About the [ 
] icon may appear on the screen. If you then continue with Live View shooting, the image quality might degrade. You should stop Live View shooting and allow the camera to rest. ] warning icon is displayed and the camera's internal temperature increases, the Live View shooting will stop automatically. Live View shooting will be disabled until the camera's internal temperature decreases.Live Mode and