Canon Group
Close Close
Menu Menu Close Close Search
EOS 1100D DSLR Support
FAQs & troubleshooting

Changing the size of still images before saving (exporting) them using ImageBrowser EX

Content Id: 8201545900


Solution

These instructions show how to change the size of images using the supplied [ImageBrowser EX] software.

To change the size of the images, use the [Email Settings] in the [E-mail Images] function.

Caution

The operations described here assume that the ImageBrowser EX software from the supplied CD-ROM (EOS DIGITAL Solution Disk) has been installed, and has been updated over the Internet.
If [ImageBrowser EX] was not included on the supplied CD-ROM, or if a CD-ROM was not included with your camera, you can download and install the [ImageBrowser EX] updater from the downloads section of the Canon Web site. Please note that you will need to have your camera ready when you do the installation.
In this section, Windows 7 is used as an example. Depending on the operating system you are using, on-screen displays and operations may differ slightly.

1. Double-click the [ImageBrowser EX] shortcut icon on your desktop to start [ImageBrowser EX].

If you cannot find the [ImageBrowser EX] shortcut icon on your desktop, click [Start] ⋗ [All Programs] or [Programs] ⋗ [Canon Utilities] ⋗ [ImageBrowser EX] and select [ImageBrowser EX] to start [ImageBrowser EX].


Caution

On a Mac, click the [ImageBrowser EX] icon on the [Dock]. If no [ImageBrowser EX] icon is found on the [Dock], click [Go] on the menu bar, select [Applications], and then open [Canon Utility] ⋗ [ImageBrowser EX], and then select and start [ImageBrowser EX].

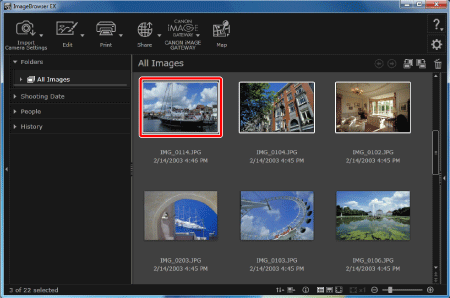
2. Once [ImageBrowser EX] starts, click the images you want to change the size of to select them.

To select multiple images, click the images while holding down the ⋖Ctrl⋗* key.

* In Mac OS X, hold down the ⋖Command⋗ key while clicking images.

To select a series of images that are lined up in a row, click the first image, and then hold down the ⋖Shift⋗ key while you click the last image.


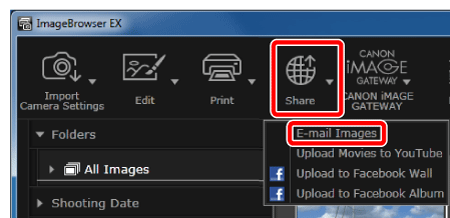
3. Click [Share], and then click [E-mail Images].


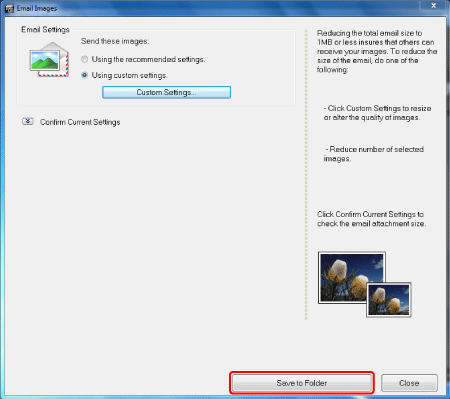
4. The [Email Images] window will appear.

Select [Using custom settings], and then click [Custom Settings].


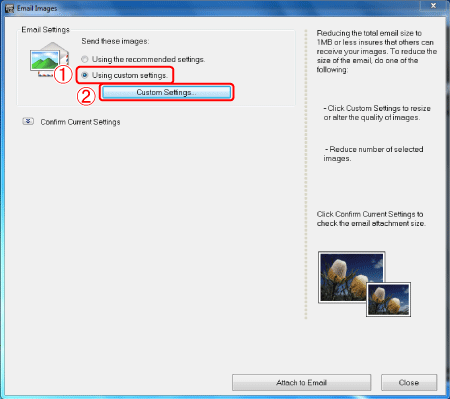
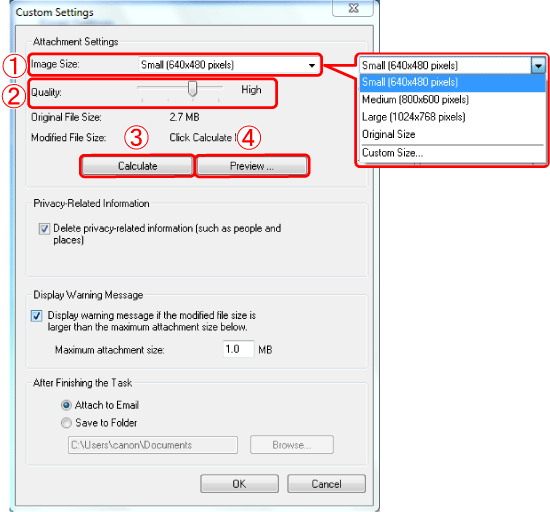
5. The [Custom Settings] screen will appear. Make settings as necessary for things like the image size and image quality.

Set the image size. If you select [Custom Size...], you can specify the number of pixels for the image size.
Adjust the image quality.
If you click , the modified file size will be shown in [Modified File Size].
A preview of the modified image will be shown.

6. Select [Save to Folder], and then click [Browse...] to set a destination. Next, click [OK].


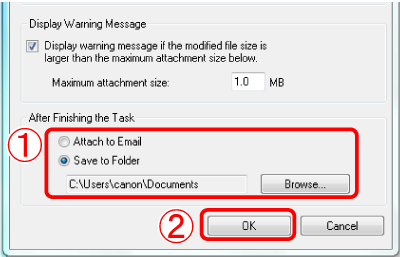
7. The following screen will appear. If you click [Save to Folder], the images will be saved to the destination you specified in step 6.


This completes the procedure for changing the size of images.

"Was this helpful?"