


Issue
Cause and solution
Setting the printer in the access point mode
If the printer is set to access point mode, printing can be performed from smartphones and other external devices without going through a wireless router.

(A) External device such as a smartphone
(B) Printer
Cause and solution
Before Starting Access Point Mode Setup
Caution
When you use the printer in the access point mode, note the following limitations:
-Connecting the printer to the Internet
Caution
If you have wireless router, you can print and scan from your smartphone or tablet PC without the above limitations.
Set up your printer while referring to [ How to connect the printer and router via wireless LAN ].
After setup of the printer, see [ Printing or scanning from an external device such as a smartphone using PIXMA Printing Solutions (PIXMA Print) ] and enjoy printing and scanning.
Cause and solution
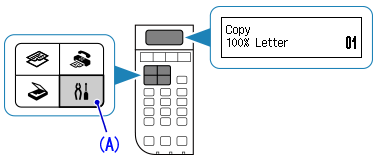
1. Press the [ Setup ] button (A).
Cause and solution
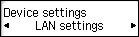
2. Select [ Device settings ], and press the OK button.

Cause and solution
3. Select [ LAN settings ], and press the OK button.
Cause and solution
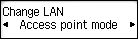
4. Select [ Change LAN ], and press the OK button.

Cause and solution
5. Select [ Access point mode ], and press the OK button.
Cause and solution
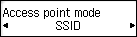
6. Select [ SSID ], and press the OK button.
Cause and solution
7. Write down the displayed SSID.
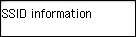
Press the OK button.
Cause and solution
8. Select [ Security protocol ], and press the OK button.
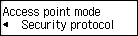
Cause and solution
9. Write down the displayed password.
Press the OK button.
Cause and solution
10. Select [ Start setup ], and press the OK button.
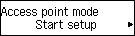
Cause and solution
11. In the Wi-Fi setting screen of your external device such as a smartphone, select the SSID and enter the password (you wrote down in Steps 7 and 9) to complete the connection.
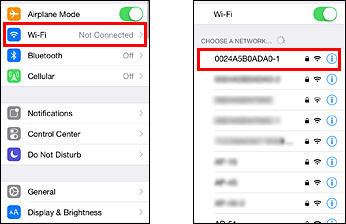
The Wi-Fi setting screen will vary according to the device you use. (This is an example of an iOS device.)
Cause and solution
Printing or scanning from an external device such as a smartphone using PIXMA Printing Solutions (PIXMA Print)
To print or scan from an external device such as a smartphone, you need to use the application software, "PIXMA Printing Solutions."
Download and install this free application software from App Store or Google Play.
Caution
When you use an Android device with the printer in the access point mode, you will not be able to connect to the Internet using the 3G line.
To download PIXMA Printing Solutions from Google Play, make the printer exit from the access point mode, download the application software, and set the printer in the access point mode again.
Caution
From the iOS devices (iPhone, iPad, iPod touch), you can print using their standard application software (Safari or mailer software, etc.) without using PIXMA Printing Solutions.
Cause and solution
Following the procedures below, select the printer to use and perform printing or scanning:
Cause and solution
1. On the screen of an external device such as a smartphone, tap the PIXMA Print icon 
Cause and solution
2. On the PIXMA Printing Solutions screen, tap the printer icon 

Cause and solution
3. Tap [ Detect Printer ].

Cause and solution
4. In the screen, select the printer you use.

Cause and solution
5. When the selected printer name is displayed under the printer icon, the settings are completed.

Cause and solution
6. Tap the button you would like to perform.
Caution
Where the scanned images are saved:
When [ Scan ] is tapped, the menu to select the file format of scanned image is displayed. The scanned images are saved to the predetermined area according to the selected file format.
- JPEG files of scanned images are saved under [ Photo Print ].
- PDF files of scanned images are saved under [ Document Print ].
- JPEG files of scanned images are saved in the /CanonIJ/scan_image folder.
- PDF files of scanned images are saved in the / CanonIJ /scan_pdf folder.
Cause and solution
Caution
To end access point mode, select other than [ Access point mode ].