

Solution
Connecting the cameras via Wi-FiSending Images to a Camera Individually
Sending Multiple Images to a Camera
You can connect two cameras via Wi-Fi and send images between them as follows.
Caution
The position and shape of the operation buttons, screens displayed, and setting items may differ depending on the model you use.
Caution
[ 


Connecting the cameras via Wi-Fi
Perform the following operations on both of the cameras to be connected.
1. Press the ⋖Playback⋗ (
2. Press the ⋖Wi-Fi⋗ (

Caution
When making Wi-Fi settings for the first time, a screen will appear for you to register a nickname for the camera.

Press the ⋖FUNC./SET⋗ (
3. Press the [ 


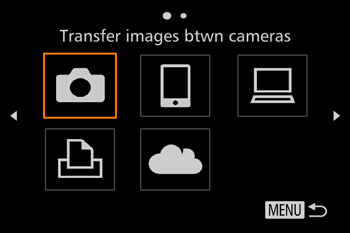
4. Press the [
Caution
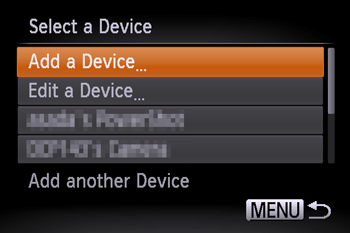
5. The following screen appears.
Follow steps 1 – 4 on the target camera too.
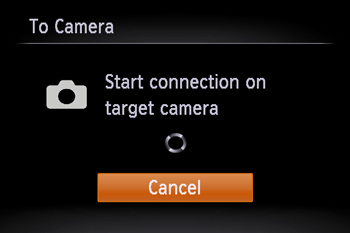
Camera connection information will be added when [Start connection on target camera] is displayed on both camera screens.
Once the other camera is registered, the screen for sending images will appear. Please see step 7 and later steps for instructions on how to send images.
6. Once both cameras are connected, a screen similar to the following one will be displayed.
Caution
] button. You can easily connect again by pressing the [ ], [ ] buttons to choose the device name. To add a new device, display the device selection screen by pressing the [ ], [ ] buttons, and then configure the setting. If you prefer not to display recent target devices, press the ⋖MENU ⋗ button, and on the [  ] tab, choose [Wi-Fi Settings] ⋗ [Target History] ⋗ [Off].
Sending Images to a Camera Individually
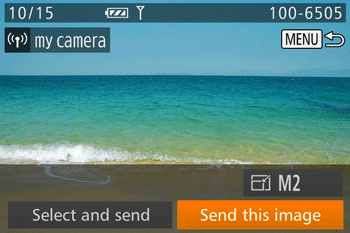
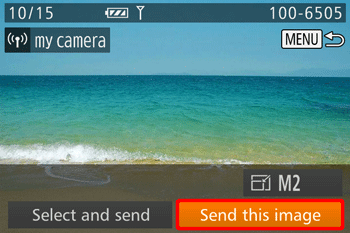
7. Press the [
Caution
], [ ] buttons.8. A screen similar to the following one will be displayed.
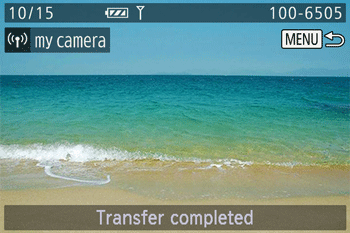
[Transfer completed] is displayed after the image is sent, and the image transfer screen shown in step 7 is displayed again.
Sending Multiple Images to a Camera
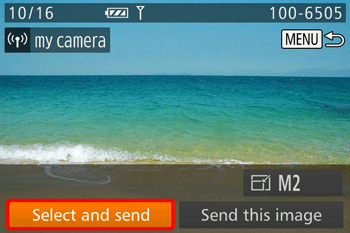
9. Press the [
10. A screen similar to the following one will be displayed.
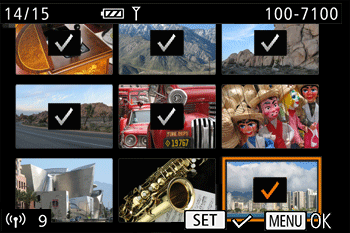
Press the [ 
To cancel selection, press the ⋖FUNC./SET⋗ (
You can also choose images in step 2 by moving the zoom lever twice toward (
After you finish choosing images, press the ⋖MENU⋗ button.
11. A screen similar to the following one will be displayed.
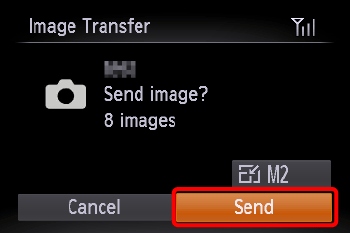
Press the [
After [Transfer completed] is displayed, the camera returns to the screen shown in step 7.
Caution
], [ ] buttons.