


About this page
This page is for the PRO-1 with firmware version 2.000 or later.
Check your PRO-1 firmware version while referring to [ How to upgrade the firmware ], and upgrade the firmware if necessary before going through this page.
With the upgraded firmware, you can perform the following:
- Printing in the color hue (in the PRO Mode) that looks like the one on the monitor
- Reducing the Fine Art Paper margin (from 35 mm to 30 mm)
- Printing on Canvas paper
Caution
The latest version of the printer driver needs to be installed.
With Mac OS X v10.4, the above new features are not available.
Windows
Caution
1. Download the printer driver from the download library.
2. Double-click the downloaded .exe file.
3. Follow the instructions on the screen to install the driver.
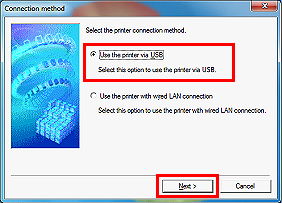
4. In the [Connection method] window, select [Use the printer via USB] and click [Next].
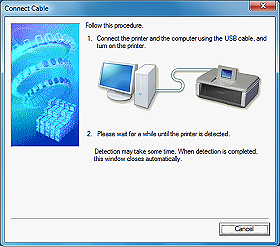
5. When you see the [Connect Cable] window, connect the printer to the PC using a USB cable.
Then, power on the printer.
6. In the [Installation Complete] window, click [Complete].
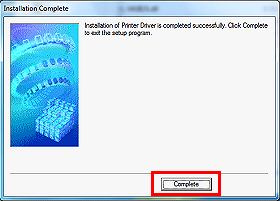
This concludes the setup via USB connection.
Mac OS X
Caution
1. Download the printer driver from the download library.
2. Double-click the downloaded .dmg file to extract it.
3. Double-click the [pkg] file.
4. Follow the instructions on the screen to install the driver.
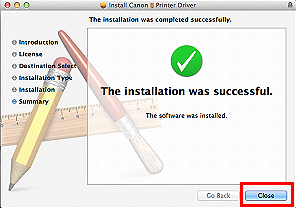
5. Click [Close] to complete the installation.
6. Connect the printer to the PC using a USB cable.
Then, power on the printer.
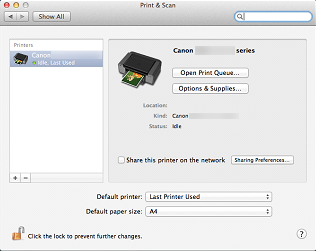
Caution
In System Preferences, click [Print & Scan] and confirm that "PRO-1 v1-1 series" is added.
This concludes the setup via USB connection.