


If you cannot shoot the subject up close with the optical zoom, please consider the following.
Caution
Getting Started
When distant subjects are too far away to enlarge using the optical zoom, use digital zoom for up to about 17x enlargement.
[  : Custom ]* : Custom ]* | [  : Manual ] : Manual ] | [  : Aperture value ] : Aperture value ] |
[  : Time value ] : Time value ] | [  : Program AE ] : Program AE ] | [  : Hybrid Auto ] : Hybrid Auto ] |
[  : Auto ] : Auto ] | [  : Portrait ] : Portrait ] | [  : Panning ] : Panning ] |
[  : Underwate ] : Underwate ] | [  : Fireworks ] : Fireworks ] | [  : Standard Movie ] : Standard Movie ] |
[  : Manual Movie ] : Manual Movie ] | [  : Time-lapse movie ] : Time-lapse movie ] | [  : iFrame Movie ] : iFrame Movie ] |
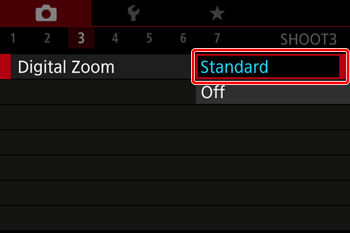
Using the Digital Zoom
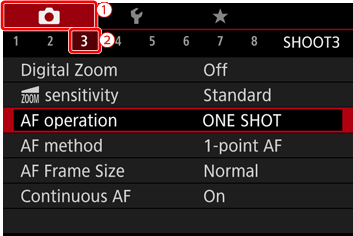
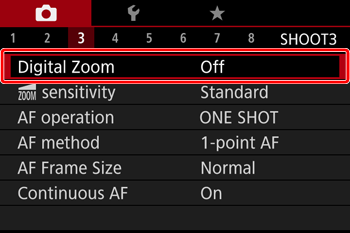
1. Press the [MENU] button.

2. Choose [ 


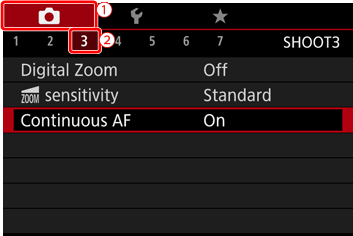
3. Press the [ 


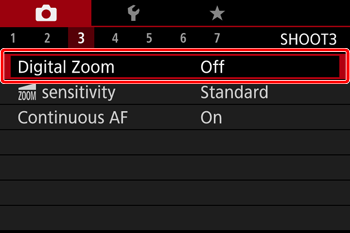
4. Press the [
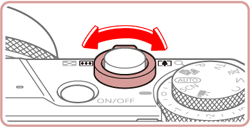
5. Move the zoom lever toward [ 
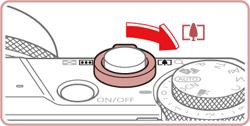
6. Move the zoom lever toward [
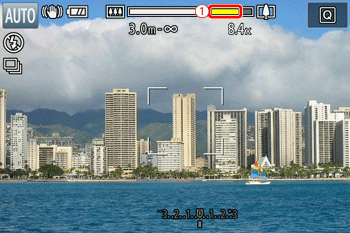
is the current zoom factor. 
Caution
- White range: optical zoom range where the image will not appear grainy.
- Yellow range: digital zoom range where the image is not noticeably grainy (ZoomPlus).
- Blue range: digital zoom range where the image will appear grainy.
Caution
: Digital Zoom], and then choose [Off]. Using ZoomPlus
Depending on how you have set the number of recording pixels and the magnification of the [Digital zoom], the [Zoom bar] (
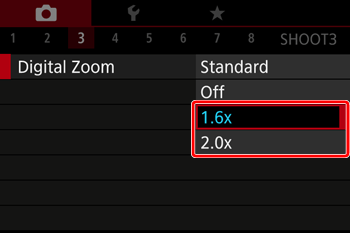
Using the Digital Tele-converter
With the [Digital Tele-Converter] setting, the focal length of the lens can be increased by approximately 1.6x or 2.0x. This can reduce camera shake because the shutter speed is faster than it would be if you zoomed (including using digital zoom) in to the same zoom factor.
Caution
* : Options vary depending on the assigned shooting mode.
1. Press the [MENU] button.
2. Choose [
3. Press the [
4. Press the [
Caution
 ] for maximum telephoto, and when you zoom in to enlarge the subject to the same size using [Digital Zoom].