


The procedure for connecting an external microphone is explained below.
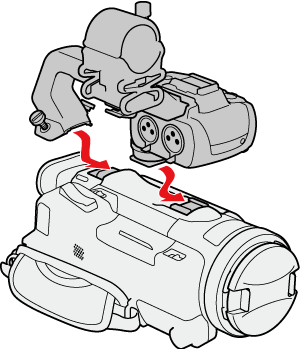
Attaching the Handle Unit
The camcorder is functional even if you remove the handle unit. However, to use the INPUT terminals, infrared light and tally lamp, the handle unit must be correctly attached to the camcorder.
Caution
1. Attach the microphone holder unit to the handle unit.
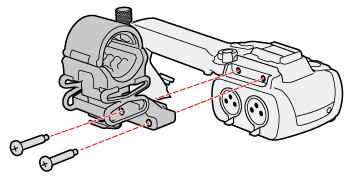
2. Align the handle unit with the handle attachment unit and then slide the handle unit forward all the way.
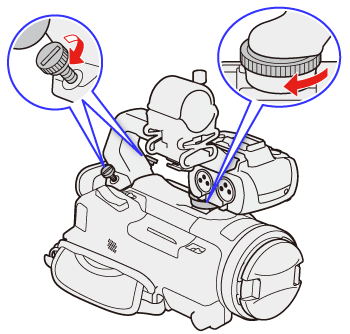
3. Firmly tighten the front and rear screws.
Connecting an External Microphone
To each of the INPUT terminals you can attach commercially available microphones or analog line-in sources with an XLR connector. To use the INPUT terminals and microphone holder, the handle unit must be correctly attached to the camcorder. To the MIC terminal you can attach commercially available condenser microphones with a φ 3.5 mm stereo mini plug.
1. Loosen the microphone lock screw (

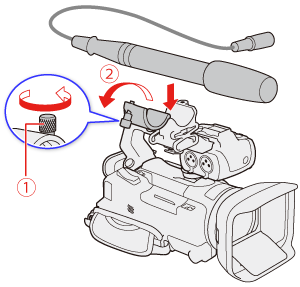
2. Tighten the lock screw and put the microphone cable through the microphone cable clamp (

3. Plug the microphone cable into the desired INPUT terminal (

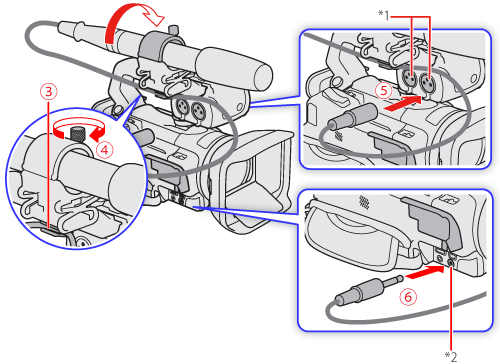
*1: INPUT 2 / INPUT 1 terminals
*2: MIC terminal