


Raise the [ISO speed] to use a fast shutter speed when you wish to reduce the effects of camera shake or avoid blurry subjects, or to turn the flash off when shooting in a dark area.
Also, with [ISO AUTO] selected, you can set the maximum ISO speed, or select the rate of change.
Caution
 ).
).In some modes ISO Speed setting is not available. Please refer to the table below.


| Function | Shooting Mode | ||||||||||||||||||||||||||||
| ISO Speed |  |  |  |  |  |  |  | SCN |  | ||||||||||||||||||||
 |  |  |  |  |  |  |  |  |  |  |  |  |  |  |  |  | |  |  | |  | ||||||||
| AUTO | * | | | | | | | | | | | | | | | | | | | | | | | | | | | | |
| ISO 125 – 12800 | * | | | | | | | | | | | | | | | | | | | | | | | | | | | | |
| *Options vary depending on the assigned shooting mode. | |||||||||||||||||||||||||||||
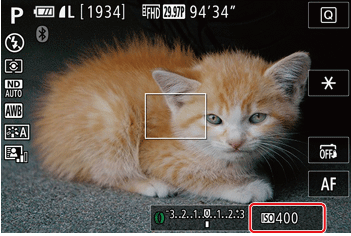
Setting the ISO Speed
Set the ISO speed to [AUTO] for automatic adjustment to suit the shooting mode and conditions. Otherwise, set a higher ISO speed for higher sensitivity, or a lower value for lower sensitivity.
1.Turn the camera on.
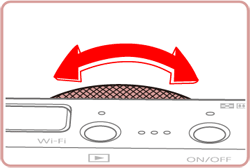
2.Changing the ISO Speed
 ], and then choose the ISO speed (either touch [
  ][
][  ] or turn the [
  ] ring).
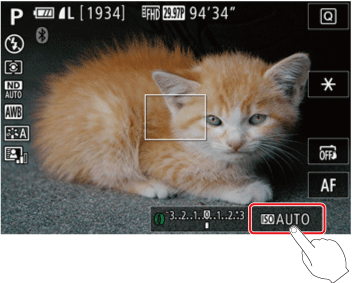
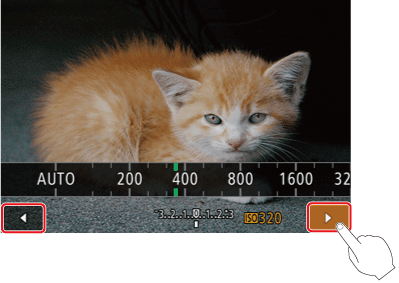
 ⋗ button to complete the settings.
Caution
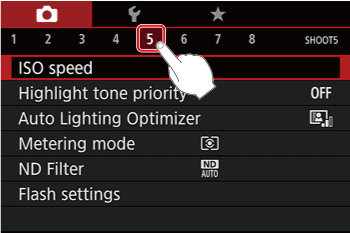
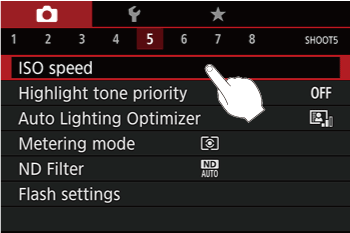
 -5 ] tab ⋗ [ISO speed] ⋗ [ISO Speed].
This concludes the procedures for Setting the ISO Speed.
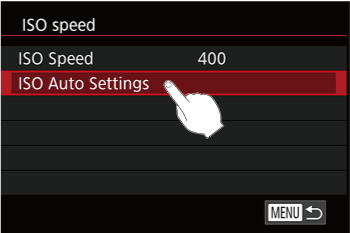
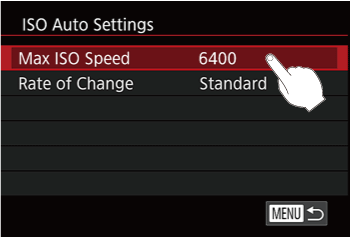
Adjusting ISO Auto Settings
When the camera is set to [AUTO], maximum ISO speed can be specified in a range of [400] – [12800], and sensitivity can be specified in a range of three levels.
1.Turn the camera on.
2.Access the menu screen.

], and then touch [5].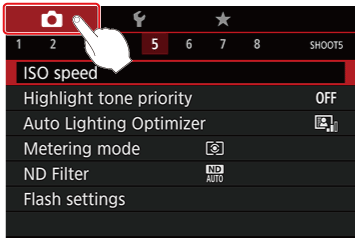
⋖Changing the Max ISO Speed⋗

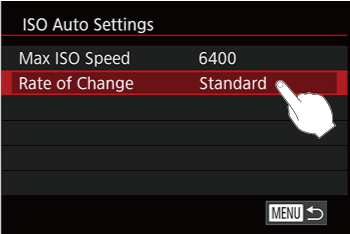
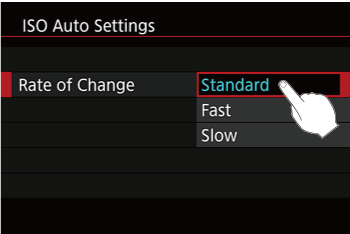
⋗ button to complete the setting.⋖Changing the Rate of Change⋗
This concludes the procedures for changing the ISO Auto settings.