

Solution
Caution
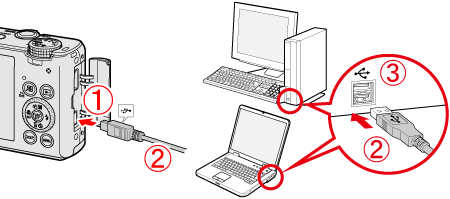
1. Connect the [DIGITAL Terminal] to the PC's USB terminal by using the [Interface Cable] that came with your camera.


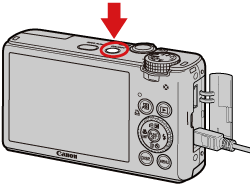
2. Press the ⋖Power⋗ button on the camera.
3. Click the (

Caution
When a window like the one below appears, click [Downloads Images From Canon Camera].

Then, proceed to Step 7.
4. The following window appears.

Double-click [Import pictures and videos] (
Caution
If [Downloads Images From Canon Camera] (

5. The following window appears.

Select
6. Now you are back to the following screen.

Double-click [Downloads Images From Canon Camera].
7. The following window appears.

8. The [CameraWindow] menu appears. Click

Caution
By default, the imported images will be saved separated by each shooting date in the picture folder.
To change the destination folder, click 
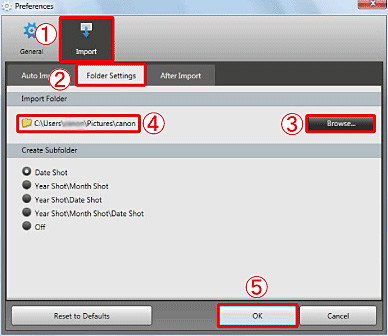
Click
Confirm the destination folder 
Then, click 
9. A window like the one shown below appears, so click

Caution
9-1. To select and import images, click [Select Images to Import] in Step 9.

9-2. Select 

9-3. The software starts importing images. After this step, please follow the subsequent procedures below.
10. The following window appears, and the computer starts to transfer images from the camera.

11. Click [OK].

12. The following window appears.

Click the (
Caution
A related application ([ImageBrowser] by default) will start automatically and the imported images are displayed.